Welcome, fellow violinists, to a new dimension of technique! Today, we’ll delve into the world of the hand frame and explore an exciting way to expand our reach on the fingerboard. Traditionally, the hand frame spans a perfect fourth between the 1st and 4th fingers. But what if we could extend it further by playing a perfect fourth with the 1st and 3rd fingers as the base on a single string? In this lesson, we’ll discuss the benefits of this expanded hand frame technique and provide exercises to help you incorporate it into your practice.
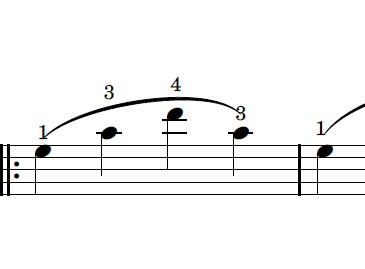
2/6 When practicing these exercises, start slowly and gradually increase your speed. Experiment with transposing finger patterns to different positions on the fingerboard. Unleash your imagination, adding musicality and expression to each exercise. pic.twitter.com/Mh4iaWRaOl
— violesson.com (@violesson) July 14, 2023
Understanding the Hand Frame
When you began your violin lessons with your first teacher, you were probably instructed to start by placing your 1st finger in first position on the string. Then, once you had “mastered” the first finger, you were allowed to progress to the 2nd, 3rd, and eventually the 4th finger. However, this approach often leads to frustration, wasted time, and unnecessary effort. By the time we finally reach the point of using our little finger, our hand is already too fixated and centered around the 1st finger. As a result, it becomes nearly impossible to position the 4th finger in a relaxed and rounded manner, leading to tension in the wrist as we attempt to reach for the correct pitch and placement on the fingerboard. Playing octaves with the 1st and 4th finger on 2 strings or even achieving a perfect fourth interval with those fingers on a single string becomes extremely challenging. The hand frame remains poorly established, and progress on the violin comes to a halt.
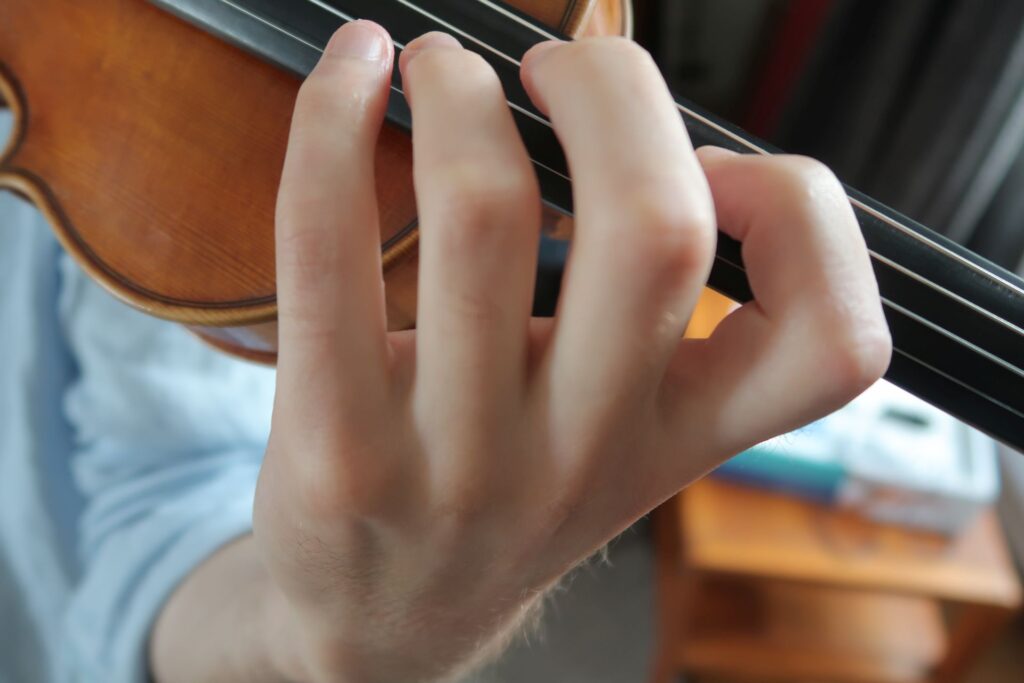
A more effective approach, however, would be to prioritize accommodating a nicely shaped rounded 4th finger placement on the fingerboard early on. By starting out with the 3rd or 2nd finger, you establish a solid hand frame right from the beginning. This hand frame achieves a sense of balance, with the 1st finger slightly reaching back and a relaxed “giving” wrist position. The thumb provides support to the neck of the violin, while the fingers naturally drop onto the fingerboard from their base joints within the palm of the hand. With this approach, the first and fourth fingers can easily form the interval of a perfect fourth within a single position.
Try this mental imagery exercise: Visualize holding a tennis ball gently in your hand, and transfer that sensation to the feeling when your violin rests on your thumb. Focus on the base knuckle of your index finger and experiment with releasing it a bit further, creating more space between the thumb and index finger. This exercise will help you establish a relaxed and balanced hand position while playing the violin.
During the initial years of violin playing, we tend to remain within the hand frame where the 1st and 4th fingers form a perfect fourth interval. Having understood the elements of a solid hand frame and the potential challenges involved, it is now time to explore the expansion of this framework.
Expanding the Hand Frame
By using the 1st and 3rd fingers to form a perfect fourth on a single string, as an alternative to the traditional 1st and 4th finger placement, we can enhance our freedom and flexibility. The ability to switch effortlessly between these two hand frame set-ups allows for smoother transitions and better coverage of the fingerboard. Moreover, this expanded hand frame technique paves the way for playing double stops larger than an octave, including tenths, in the future.
Exercises
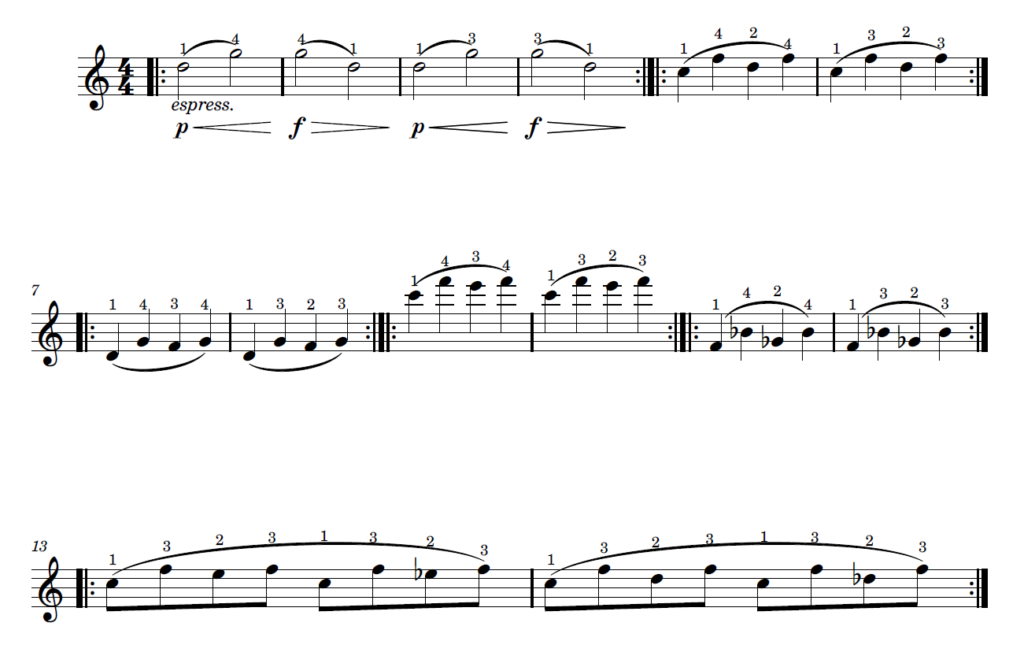
Here are a series of exercises designed to help you establish the hand frame with the 1st and 3rd fingers. As you work through these exercises, remember to start off slowly and gradually increase your speed. To enhance your fingerboard proficiency, transpose the finger patterns to various positions across the fingerboard. Don’t forget to let your imagination run wild, infusing each exercise with musicality and expression. By engaging your mind and maintaining focus throughout your practice sessions, you’ll pave the way for remarkable improvement. Set aside just 15 minutes a day for a few weeks to work on these exercises, and you’ll soon experience the remarkable benefits they offer. So, grab your violin and let’s dive right in!
IMPORTANT: In the following exercises, whenever a higher finger is followed by a lower finger make sure to place these fingers simultaneously on the string. For example, in the fifth bar, place the 4th and 2nd finger on the string at the same time (the 4th on the F and 2nd on the D). In this way you only need to lift the 4th finger and the correct pitch, played by the 2nd finger, will sound. In the sixth bar the 3rd and 2nd finger are placed on the string simultaneously (the 3rd on the F and the 2nd on D). This pre-placement of the fingers should become a habit in all of your violin playing.


